
 热门精品专业
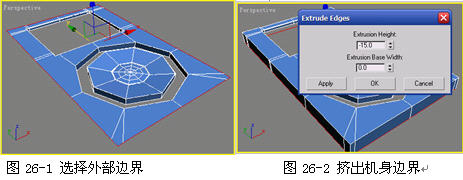
(1)在透视图中右击,从弹出的快捷菜单中选择“Unhide All”命令,显示出所有的对象。再在透视图中右击机身模型,从弹出的快捷菜单中选择“Hide Unselected”命令,使视图中只显示机身模型,如图26-1所示。
激活“Border”子级别,选择机身模型外围的边界,单击“Edit Borders”卷展栏中的“Extrude”按钮,在弹出的对话框中设置“Extrusion Height”值为-15,单击“Ok”按钮对边界进行挤出操作,得到如图26-2所示的结果。
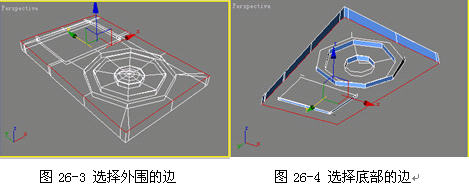
(2)激活“Edge”子级别,选择如图26-3所示的边,单击“Edit Edges”卷展栏中的“Chafmer”按钮右边的对话框,在弹出的面板中设置“Chamfer Amount”为0.6,对边进行切角处理。
再选择如图26-4所示的边界,单击“Edit Borders”卷展栏中的“Cap”按钮进行封盖。
(3)激活“Polygon”子级别,选择机身底部的多边形,单击“Edit Polygons”卷展栏中的“Inset”按钮右边的对话框,在弹出的对话框中设置“Inset Amount”值为1.2,单击“Apply”按钮后再单击“Ok”按钮,结束当前的操作,结果如图26-5所示。
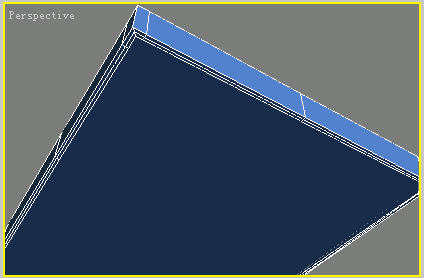
图26-5 插入多边形
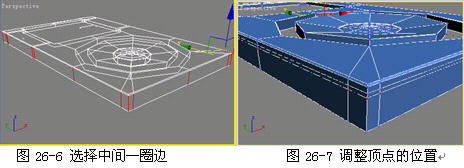
(4)通过对ipod实物的观察,我们发现机身是由上下两部分组成。下面要在机身的中部制作一个向内陷的凹槽。激活“Edge”子级别,选择中间的一圈边,如图26-6所示。单击“Edit Edges”卷展栏中“Connect”按钮右侧的对话框,在弹出的对话框中设置“Segments”为2,单击“Ok”按钮,激活“Vertex”子级别,将中间顶点的位置调整到如图26-7所示的位置。
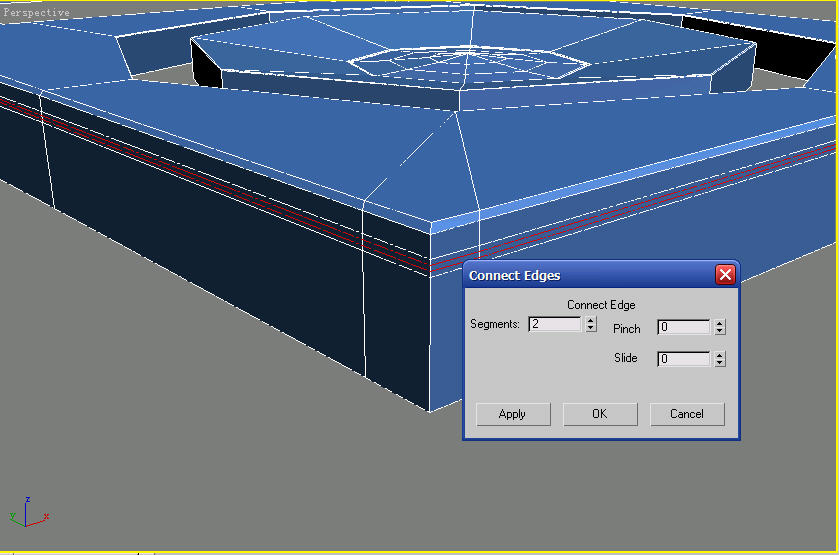
(5)激活“Edge”子级别,选择中间两条边中的任意一条连接它们的边,单击“Selection”卷展栏中的“Ring”按钮,选中中间两条边之间的所有边,再单击“Edit Edges”卷展栏中的“Connect”按钮右侧的对话框,在弹出的对话框中设置“Segments”为2,单击“Ok”按钮结束操作,结果如图26-8所示。
(5)激活“Edge”子级别,选择中间两条边中的任意一条连接它们的边,单击“Selection”卷展栏中的“Ring”按钮,选中中间两条边之间的所有边,再单击“Edit Edges”卷展栏中的“Connect”按钮右侧的对话框,在弹出的对话框中设置“Segments”为2,单击“Ok”按钮结束操作,结果如图26-8所示。
图26-8 连接边
(6)激活“Polygon”子级别,选中刚才连接两条边之间的所有多边形,再单击“Edit Polygons”卷展栏中的“Extrude”按钮右侧的对话框,在弹出的对话框中设置“Extrusion Type”为Local Normal方式,然后设置“Extrusion Height”值为-4。单击“Ok”按钮结束当前操作,结果如图26-9所示。按Delete键删除刚刚挤出的多边形,因为ipod机身上下两部分的材质不同。通过这种方法可以将其分为上下两个子对象。
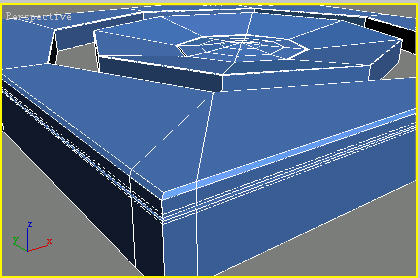
图26-9 挤出多边形
(7)激活“Edge”子级别,这时发现中间的两条边已经被自动选中,单击“Chamfer”按钮右侧的对话框,在弹出的对话框中设置“Chamfer Amount”为0.02,对这两条边进行切角。切角量越小,模型细分后边缘的倒角就越小。
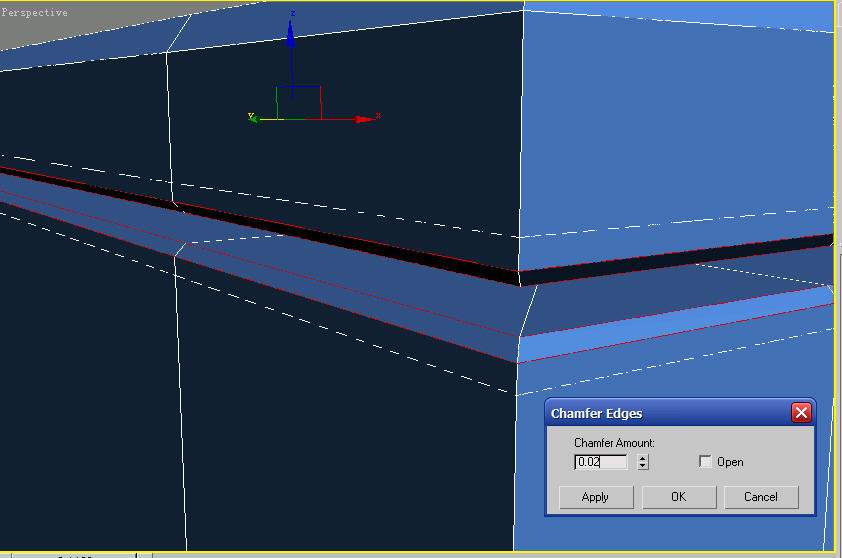
图26-10 切角边
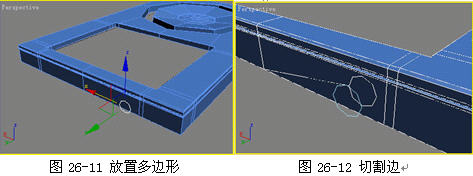
(8)下面制作位于机身顶部的耳机插孔。在后视图中创建一个“Radius”为4,“Sides”为8的Ngon作为参考图形,并放置在如图26-11所示的位置。选中ipod机身,单击“Edit Geometry”卷展栏中的“Cut”按钮,在透视图中按照参考图的位置切割,效果如图26-12所示。
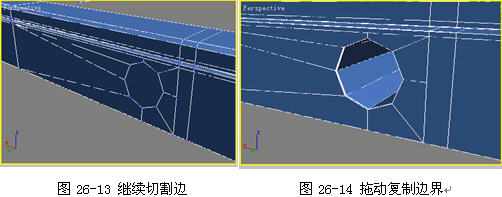
(9)继续参照图26-13切割边,然后删除中间的多边形。激活“Border”子级别,选中如图26-14所示的边界,在透视图中按住Shift键不松配合移动工具进行复制边界的操作,施加3次,效果如图26-14所示。
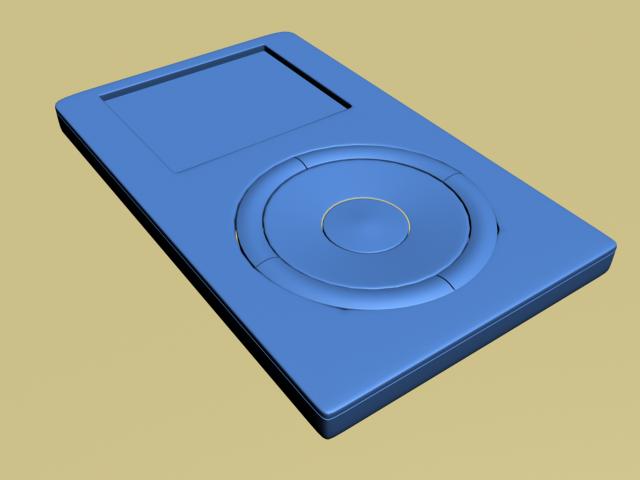
(10)到此,ipod模型部分就已经全部制作完成了。将所有隐藏的对象解除隐藏。下面要对模型表面进行光滑处理。进入机身的“修改”面板,选中“Subdivision Surface”卷展栏中的“Use NURMS Subdivision”复选框,设置“Iterations”为2。最后在顶视图中创建一个平面作为桌面,放置在ipod模型的下方,最终效果如图26-15所示。
(9)继续参照图26-13切割边,然后删除中间的多边形。激活“Border”子级别,选中如图26-14所示的边界,在透视图中按住Shift键不松配合移动工具进行复制边界的操作,施加3次,效果如图26-14所示。
(10)到此,ipod模型部分就已经全部制作完成了。将所有隐藏的对象解除隐藏。下面要对模型表面进行光滑处理。进入机身的“修改”面板,选中“Subdivision Surface”卷展栏中的“Use NURMS Subdivision”复选框,设置“Iterations”为2。最后在顶视图中创建一个平面作为桌面,放置在ipod模型的下方,最终效果如图26-15所示。
图26-15 最终结果
安徽新华电脑学校专业职业规划师为你提供更多帮助【在线咨询】